How to make half-laps on the sliding miter saw
Do you have ever thought to make half-laps using a miter saw? This is quite complicated by using a normal miter saw or compound miter saw or table saw. Therefore, you can use a good sliding miter saw in order to make half-laps very easily and smoothly. Moreover, the finishing of the half-laps will be amazing using a sliding miter saw.

If you have a sliding miter saw, you can easily make a half-lap for making any structure. Today, we will show you some steps to make it right.
Things you will need for this purpose
- Marker or pencil to mark
- Scale or ruler to measure the dimensions
- The wood piece or material that you want to make half-lap
- A sliding miter saw
Step by Step Process to make half-laps
Follow the bellow steps in order to make the perfect half-laps easily to make it right.
Step-1
First of all, you will need to use a pencil or marker and take the scale to measure the dimensions you want to cut off. Take the wood piece that you want to cut half-lap for the work.
This is important to measure the right piece and make marks. If your dimensions are wrong, then, you can’t be able to prepare a good half-lap. In this case, measure and mark the wood.
Step-2
You will need to take scraped wooden piece against the fence of the sliding miter saw. This will allow your miter saw to cut the half-lap perfectly.
If you do not use anything to support the fence, the miter saw can’t cut the half-lap fully. As a result, you will never get the desire result from the tool.
Step-3
You will need to use the depth stuff of the sliding miter saw perfectly. This is important to set the depth stuff because this will not allow the machine to down perfectly and fully.
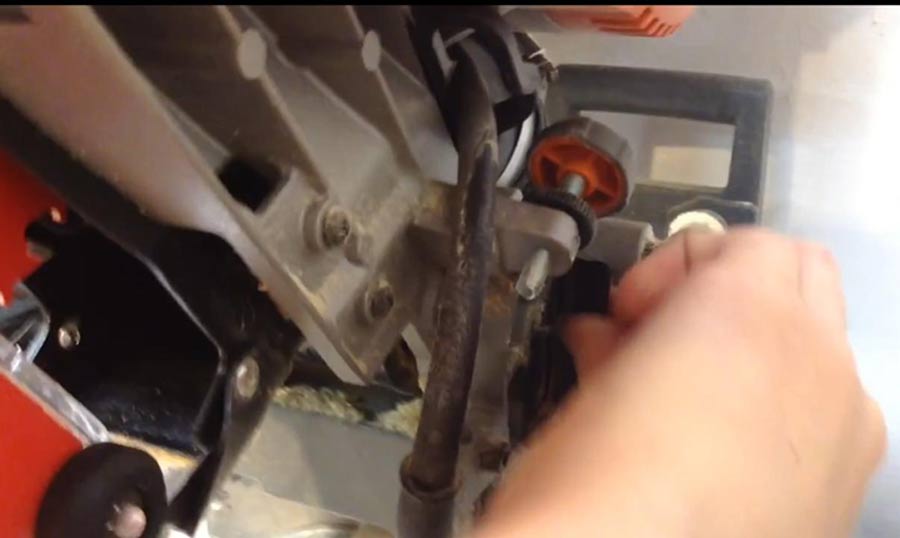
You do not need to remove the stuff completely in order to set the depth. You can just loss the pin in order to make it wisely and easily. Removing the depth stuff pin will take trouble to make it right again.
Step-4
You will also need to check the depth stuff length is good for you. In this case, you can check the depth is good and accurate by lowering the sliding miter saw very easily.
Step-5
Turn-on the sliding miter saw and make the first cut to do it right. You just pull down the miter saw and this will cut the half-lap perfectly.
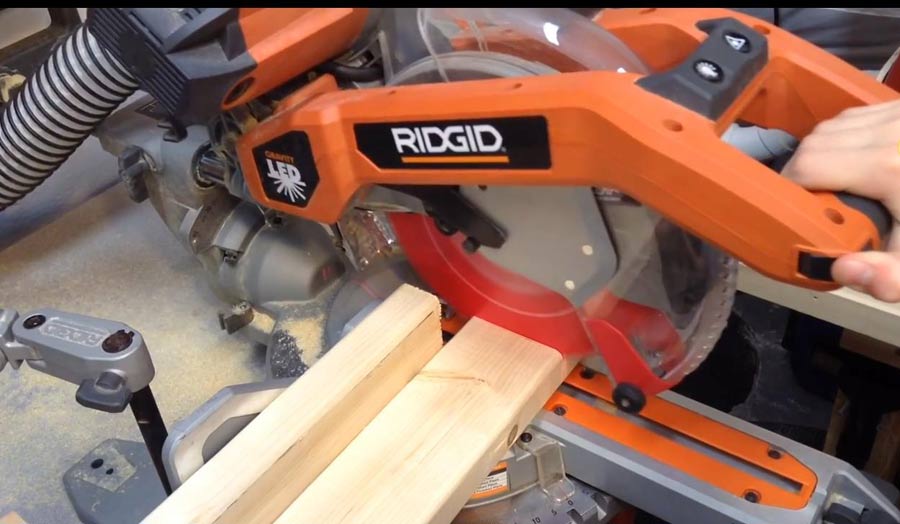
Step-6
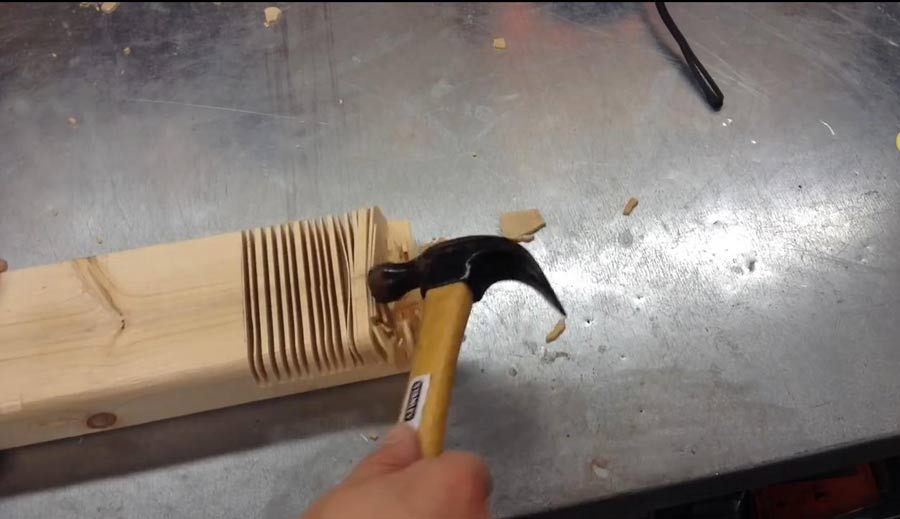
Now you can make cutout lines in order to remove the external part of the half-lap. In this case, you will need to cut the other part of the first line perfectly.
You will not need to remove the thing fully because this will make the surface rough. Therefore, you should make lines and hammer the small lines later to get a good shape.
Step-7
Now you can take the hammer and keep doing like in the picture. You will not need to pressure too much because this is an easy task. So, follow the picture and keep removing the pieces very easily and comfortably.
Step-8
In order to remove the rest of the small pieces on the surface, you can use a sander machine. The sander machine can easily remove all the small pieces from the wooden surface very easily. Don’t forget to get the interesting things and use a good sanding machine.
You can make more half-laps very easily using the tools and process. Don’t forget to use the fence and fix the depth of the sliding miter saw. These two are the most important part that you will need to set. Otherwise, you will never get the perfect shape of the half-laps. Then, you can use the perfect glue and pins in order to make the proper structure that you want to create.
Conclusion
Video for those who don’t want to read:
Hopefully, you will not face any trouble to make any half-lap for your next project. Just follow the steps so that you can make anything you want. Don’t forget to ask us anything if you are facing any problem. We will try our best in order to use the right thing and give you properly information.