Safe and Quick Fix To Replace Miter Saw Blades
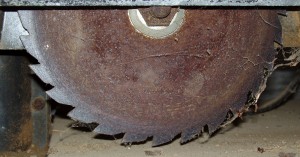
Every part of an equipment is important but if there is something very crucially important in a miter saw equipment, that would be, its circular saw‘s blade. Keeping a good set of blades as your spare parts would be a great help when you will soon figure out that your current blade is already getting dull.
Here are some manifestations that you can look at to know if you already need to replace the blade of your miter saw:
- If the substance you cut through the blade gets an obviously rough cutting marks, this means that the blade you are using is already over used.
- If it will already take you a lot of effort to push the saw and complete the cut, this means that the blade you are using is already dull. Keeping a dull blade and using them will make you become more tired every after you finish your work. A good piece of blade are supposed to give you a smoother cutting works.
- If the blade is already leaving scars or char marks into the substance that you are cutting, then you are up to change it. This dull blades will just make your work unpleasant and can in fact cause danger to your cutting activities.
The Quick Replacement
Removing the Blade
First thing’s first. The blade guard needs to be removed from covering the blade. Before you could have an access to the blade itself, here are the steps that you need to follow in doing away with the cover guard.
Tool/s needed: Screwdriver
Step 1: Unplug the equipment.
Step 2: Pull the blade guard up.
Step 3: Using the screwdriver, loosen the screw which holds the blade guard mounting hardware.
Step 4: Once loosened, you need to pull the mounting hardware back to have a clearer access on the screw that holds the blade to the equipment.
Now that your way to the blade is already clear, here are the steps that you need to follow to remove the old blade.
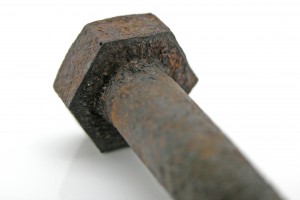
Tool/s needed: Wrench that will suit in removing the bolt which holds the blade.
Step 1: Place a wood under the blade and push the saw down into the wood. In this way, you can prevent the blade from spinning while doing the rest of the steps. If this is not done, removing the blade will be more hazardous for you.
Step 2: Using the wrench, turn the bolt clockwise to loosen it. By this time, it’s already up with you if you will lift the saw from the wood to do the next step as this will depend on what works best for your convenience.
Step 3: Remove the bolt away from the saw. You can just do this with your hands since the bolt has previously been loosened.
Step 4: Remove the blade flange, which is a ring or plate that also holds the blade into the saw.
Step 5: Remove the blade.
When installing the new blade, you will just practically need to do the aforementioned steps in a reversed manner. But don’t worry, we will still be providing you with clearer instructions on how to do it but before that, here are a few suggestions that you might want to consider before installing the new blade.
Things You Might Want to Look At
First, you might want to make some clean up with those inner parts of your saw where sawdust could have probably thrived for a long time. In order to do this, just use a brush then clean the dust from inside the blade holder reaching into the deepest hidden part of this holder. If you could notice that there are some rust on the blade mount, wipe them with a cloth having a generous amount of cleaning oil to loosen the rust and totally remove them.
And how about the flange and bolt? Check if they might also be needing some clean up too. If yes, simply wipe them with a dry cloth or if they seem to be rusty, wipe them with cloth having a small amount of cleaning oil to remove the rust.
In case you do not have a spare blade, you could consider sharpening your new blade from a service center or do it by yourself if you have the right tools to do so. But in most cases, having a set of new blades is more preferred.
There are also instances when the removal of the blade is done not to replace the whole thing but just to clean the blade up. In cleaning round blades, you need to follow the safety measures needed and make use of the right saw blade cleaners.
Re-Installing The New or Cleaned Blade
Once you are done with those add-on activities should you made the decision to consider them, here are now the steps to re-install the new blade back to the saw.
Tool/s needed: Wrench, which is the same that you used earlier
Step 1: Slip the new blade into the saw.
Step 2: Put back the blade flange.
Step 3: Put back the bolt and tighten it into the blade in a counter clockwise rotation.
Step 4: Pull the saw down to the wood once again to avoid the blade from spinning when doing the succeeding step.
Step 5: Using the wrench, tighten up the bolt, still in a counter clockwise rotation.
Now that your new blade is installed, it’s time to return the blade guard back to its place.
Tool/s needed: Screwdriver
Step 1: Pull the saw back up away from the wood
Step 2: Return the blade guard mounting hardware back into its location
Step 3: Put the screw in and tighten the screw with the screw driver and voila! You’re done.
So when you think you already need a blade replacement, just follow the simple steps above and you will surely get the most out from your miter saw. Always remember, a dull blade leaves you with a dull output and worst, will be very dangerous if you force to use them for long. So don’t let it happen into your wood works ever.